
The solar shower is finally up and working.
The heating system I first put together in May has proved itself workable. With a few adjustments of radiator position and the purchase of a self-standing garden shower that fits into the garden hose system I’ve used for the pipework, the system gives us enough hot water on a sunny day for anything between 2 (luxurious) and 4 (frugal) showers, but until recently the only way to use it was to stand on the bare earth out in the open. The quinta isn’t a particularly public place, but we all agreed we needed a cubicle to enhance our bathing experience …

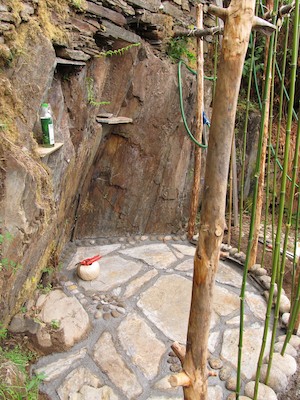
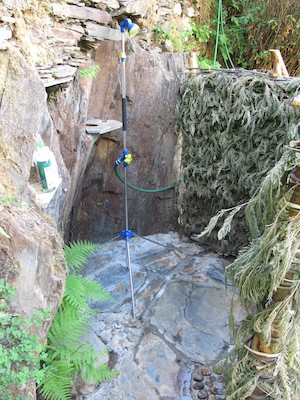
A view of the whole system with the cubicle partially complete – radiator, tank above, shower and cubicle
The water heating works like this. We start the day with an empty tank on the terrace above. As soon as the sun has warmed the water in the radiator until it’s almost too hot to touch, we turn on the cold water supply which feeds into the bottom of the radiator. The pressure pushes the water up through the radiator, warming it on the way and, by a combination of pressure and convection, the hot water rises to fill the storage tank. Adjusting the flow gives the optimum water volume to achieve the desired heat. Since there is only the one feed into the shower, we aim for a water temperature around 40°C so no further mixing of water is necessary.
And here is the evolution of the cubicle …
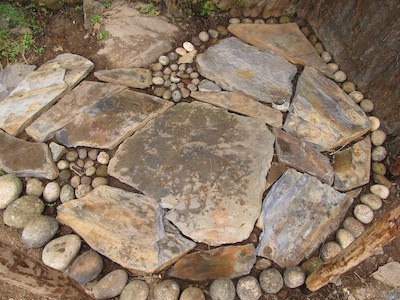
Layout of the floor, a mixture of schist slabs and granite river stones. (A necessary photo so I could see how it all went back together again after mixing the cement …) Round the circumference are 4 pine poles, stripped of bark, buried to a depth of half a metre and with the buried portion of the poles preserved with used engine oil
Floor complete and bamboo poles strung between the pine poles
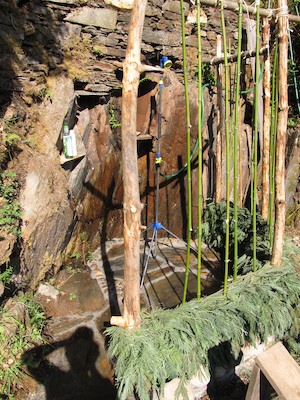
The beginnings of the walls – young mimosa (Acacia dealbata) sprigs woven through the bamboo and pine poles

The quality control inspection team

The final position of the solar collector (aka radiator)

Wall detail

Schist shelving

Drain. There are two of these with the floor slightly sloping towards them. The water goes straight into the soil outside the cubicle and this area will be planted up with ornamental plants. In time we’ll experiment with edible ones
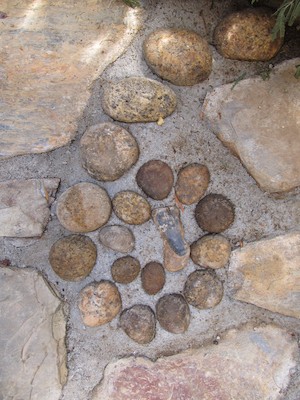
River stone floor detail

A small dry-stone schist retaining wall (complete with fish sculpture) to hold soil for growing ferns and strawberries. There is a tiny natural spring that comes through the rock at this point – it seemed a wasted growing opportunity just to let the water seep into the shower unused

Basketry walls at final height and with bamboo poles trimmed down. Mimosa isn’t the most robust of materials. It will become brittle with age, so I’ve planted ivy round the base of the walls and am thinking about Ipomoea as well. The idea is that the plants will become a living wall and hold the structure together. Maybe it will work, maybe it won’t. We’ll see …
The inside of the shower

The trimmed and finished cubicle

Is this the final configuration of the shower? No. The present system works well, but it’s a bit too high-maintenance to be wholly practical. Since our water supply is just a hose in the stream, the cold water feed can be a bit variable and prone to air locks, requiring frequent adjustment of the tap to reset the rate the water passes through the radiator. This will be sorted once we sort out our water supply properly, but someone still has to remember to turn it on and off at the beginning and end of the day. And there are other issues.
The tank on the terrace above isn’t ideal for the purpose. It lacks insulation that would prevent heat loss once the sun is off it. It’s also plastic and prone to leaking where the thread got damaged by a brass fitting in its previous incarnation as the washing machine supply. And since it’s not designed for this purpose, there aren’t any other threaded connections I can use to experiment with indirect or recirculating heating methods and I’d like to try those out. A standard foam-insulated copper indirect hot water cylinder would be a lot better.
kate August 11, 2011
nice one! I loved doing the dishes outdoors in Sierra Nevada, Spain : my friends had rigged an old stainless steel sink with hose to taps and runoff to garden.
You could seal the tank with epoxy at the joints, but I’d guess you are trying to use only natural products.
Quinta do Vale August 11, 2011
We have a sink in the yurt with a similar arrangement.
I’ve used PTFE tape on the tank. It’s good enough as a temporary measure, but the main problem with the tank is that there are no other threaded connections. This means I can’t set up a recirculating arrangement, taking cold water from the bottom of the tank and sending it through the radiator and back to the tank, because it’s unpressurised and gravity fed and the returning hot water can’t therefore rise higher than the water level in the tank so it won’t feed in through the top. TBH it’s just a crap tank for the purpose, but it was handy so I used it. Now I’ve proved the concept I want to play some more! Quite fancy trying out an indirect heating method, filling the radiator and its associated pipework with oil rather than water. It’ll get to higher temperatures and resist corrosion better. And a ballcock in a cold water feed header tank will make the whole refilling-the-tank process automatic.
BTW I’m not being a Luddite or anal about using only natural stuff. The principle is to be as low tech, low embodied energy and natural as possible, but also to be as efficient as possible. Where plastic and other man-made substances offer a considerable advantage over any natural equivalent and are the appropriate materials for the job, then we use them.
Bjorn June 20, 2014
I have a very similar heating system where I live. I made mine out of 3/4″ pvc piping. I can heat 130liters of water up to 56C in 1 day. I have both hot and cold water taps in my shower. I insulated the tank with cardboard boxes. it would be worth your while insulating the hoses going from the radiator to the tank also. To make your refill ‘automatic’ you can leave the filling valve open ever so slightly. that way everyone showers at the end of the day while water just trickles in, not really noticeable that the water cools down. that way it fills all night long until it reaches the top. there you instill a float valve like you have inside a toilet. Like this it has been working great for me. I also installed a super lightweight one way valve to make sure the thermo cycle doesn’t reverse at night. very simple to make yourself.
Quinta do Vale June 20, 2014
Hi Bjorn. Thanks for your input. This shower has now been pretty much retired since we started using our cob bathroom and solar water heating system designed specifically for it. We now use a 100m roll of 40mm black pipe which acts as its own tank as it holds 80 litres of water and it’s fed continually from the main 12,000-litre tank supplying the entire quinta. It can provide many showers throughout the day, giving 2-3 good showers at a time and only taking an hour to heat up to over 60°C in full sun.